
Let’s be real — your home should feel like a sanctuary, not an obstacle course. For wheelchair users, even small things like a raised threshold or a narrow doorway can turn a simple morning into a frustrating puzzle. But here’s the good news: with the right modifications, your space can become a place of freedom, safety, and genuine comfort. We’re talking about changes that make life smoother, not just “accessible” in a clinical sense. So, let’s roll up our sleeves — pun intended — and explore the real-world modifications that actually matter.
First, The Mindset Shift: It’s Not Just About Ramps
Honestly, when most people think “wheelchair accessible,” they picture a ramp. And sure, ramps are great. But accessibility is way more nuanced. It’s about flow. It’s about how you move through a room without bumping into furniture, or how you grab a cup of coffee without twisting your back. Think of it like this: your home is a stage, and you’re the lead actor. Every modification should let you perform your daily routine with ease — no awkward choreography.
Entryways: The First Hurdle
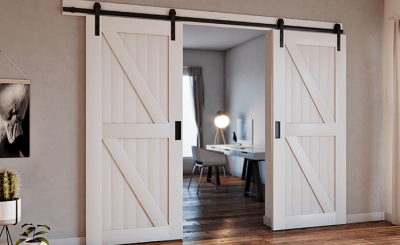
You know that feeling when you’re trying to get inside, but the door swings the wrong way? Or the threshold is like a mini speed bump? Yeah — that’s a pain point. Start with the front door. A zero-step entry is ideal, but if that’s not possible, a portable ramp or a threshold ramp can work wonders. Also, consider widening doorways to at least 32 inches (36 is even better). And don’t forget the door handle — lever handles are a game-changer over round knobs. They’re easier to grip, especially if you have limited hand strength.
Here’s a quick checklist for entryways:
- Install a ramp with a gentle slope (1:12 ratio is standard).
- Add a covered porch or awning — rain and snow are no joke.
- Swap out doorknobs for lever handles.
- Consider a video doorbell or smart lock for easier access.
Kitchen: The Heart of the Home, Made Accessible
The kitchen is where independence really shines — or, well, where it can get snagged. Imagine trying to cook a meal when you can’t reach the upper cabinets or the counter is too high. Frustrating, right? The key here is “work triangle” — the path between the sink, stove, and fridge. For a wheelchair user, that triangle needs to be wide and clear. No sharp turns, no tight corners.
Countertops and Cabinets
Lowered countertops (around 28 to 34 inches high) are a must. But you don’t have to redo the whole kitchen — consider a pull-out cutting board or a drop-leaf table that fits under the counter. For cabinets, go with pull-out shelves or lazy Susans. Honestly, reaching into a deep cabinet from a wheelchair is like trying to find a needle in a haystack. And for upper cabinets? Install them lower, or use a motorized lift system. Fancy, I know, but totally worth it.
Another trick: a side-opening oven or a cooktop with front controls. That way, you’re not reaching over hot burners. Safety first, always.
Bathroom: Where Safety Meets Dignity
Okay, let’s talk bathrooms. This is often the trickiest room — and the most personal. A slippery floor, a high tub, a toilet that’s too low… it’s a recipe for stress. But with a few smart changes, you can turn it into a spa-like retreat.
Roll-In Showers and Grab Bars
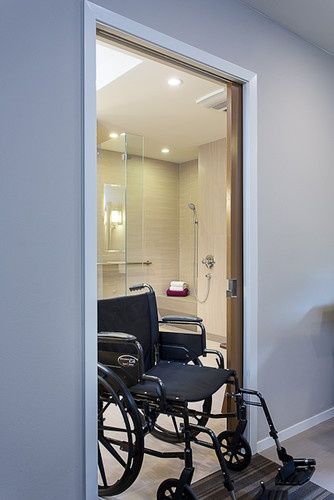
A roll-in shower with no curb is a game-changer. You just wheel right in. Add a handheld showerhead and a fold-down shower seat, and you’re golden. Grab bars are non-negotiable — install them near the toilet, shower, and even next to the sink. But here’s a pro tip: don’t just use the cheap suction-cup ones. Get bars that are anchored into the wall studs. They need to hold real weight, you know?
Also, consider a comfort-height toilet (around 17 to 19 inches tall). It makes transfers way easier. And if you have the space, a wall-mounted sink lets you roll right under it. No more awkward leaning.
| Modification | Why It Helps | Approx. Cost Range |
|---|---|---|
| Roll-in shower | No step-over, easy access | $2,000 – $8,000 |
| Grab bars (installed) | Stability and safety | $150 – $500 |
| Comfort-height toilet | Easier sit-to-stand | $200 – $600 |
| Wall-mounted sink | Wheelchair clearance | $300 – $1,200 |
Bedroom and Living Spaces: Comfort Meets Flow
Your bedroom should be a place to recharge, not a place to wrestle with furniture. Start with the bed height — it should be at the same level as your wheelchair seat (usually around 18 to 20 inches). This makes transfers smooth, almost like sliding from one seat to another. And leave enough space around the bed — at least 3 feet on one side — for turning.
In the living room, think about clearance. A standard wheelchair needs about 36 inches of width for a turn. So, rearrange that sofa. Move the coffee table. Create a clear path to the TV, the bookshelf, the window. And consider adjustable-height tables or desks — they let you work or eat without straining your neck.
Flooring: The Silent Hero
You might not think about flooring much, but it matters — a lot. Thick carpet can be a nightmare for wheels. Hardwood, laminate, or luxury vinyl tile are way easier to roll on. Plus, they’re easier to clean. Just watch out for area rugs — they can bunch up and create tripping hazards. If you love rugs, use low-pile ones with non-slip pads.
Smart Tech: The Little Things That Add Up
We live in a smart world, so why not use it? Voice-controlled lights, smart thermostats, and automated blinds can make a huge difference. Imagine saying, “Hey Google, turn on the kitchen light,” instead of reaching for a switch. Or using a smart lock that opens with your phone. These aren’t luxuries — they’re tools for independence.
And for the love of all things practical, consider a video doorbell. You can see who’s at the door without having to wheel over. It’s a small thing, but it saves energy. And energy, my friend, is precious.
Funding and Resources: You Don’t Have to Do It Alone
Now, I know what you’re thinking: “This all sounds great, but who’s paying for it?” Fair question. Some modifications can be pricey, but there are options. In the U.S., you might qualify for grants through the Department of Veterans Affairs (if you’re a veteran) or state-level Home and Community-Based Services (HCBS) waivers. Nonprofits like Rebuilding Together or Habitat for Humanity sometimes offer free or low-cost modifications. And don’t forget about tax credits — the IRS allows deductions for certain medical home improvements.
Also, check with your insurance. Some policies cover grab bars or ramps if prescribed by a doctor. It never hurts to ask. And honestly, even if you only do one or two changes at a time, that’s progress. Rome wasn’t built in a day, and neither is an accessible home.
A Few Final Thoughts — No, Really
Look, modifying your home isn’t about making it look “medical” or sterile. It’s about making it yours. A space where you don’t have to think twice about moving from the kitchen to the bathroom. Where you can host a dinner party, read a book, or just sit and watch the rain without a single barrier in your way.
Start small. Maybe it’s just a grab bar in the shower. Or a lever handle on the front door. Each change is a step toward freedom. And that’s something worth rolling toward.
So go ahead — measure your doorways, test your thresholds, and dream a little. Your home can be more than accessible. It can be a place where you truly thrive.