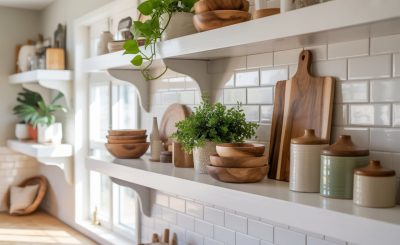

Let’s be honest — there’s something almost magical about snipping fresh basil into a simmering pasta sauce or plucking mint for a cocktail. It’s not just convenience; it’s a tiny, everyday luxury. And guess what? You don’t need a sprawling backyard or a green thumb. Indoor herb gardening for culinary use is easier than you think. In fact, it might just become your favorite kitchen habit.
Sure, those little plastic packs of herbs from the grocery store work in a pinch. But they wilt fast. They cost a fortune per ounce. And honestly? They lack that just-picked punch. Growing your own? That’s a game changer. Let’s dig in — literally.
Why Bother Growing Herbs Indoors?
Well, for starters, you get fresh flavor 24/7. No more sad, slimy cilantro. No more last-minute dashes to the store. Plus, indoor herb gardening for culinary use saves money — a single $4 basil plant can yield more than $20 worth of leaves over a season. And there’s the vibe: green leaves on your windowsill make any kitchen feel alive.
But here’s the real kicker: you control what goes into the soil. No pesticides, no mystery chemicals. Just pure, clean flavor. And for anyone who’s ever burned a garlic clove (guilty), having fresh herbs nearby is like having a safety net — they rescue even the most mediocre dish.
Choosing the Right Herbs for Your Indoor Garden
Not all herbs are created equal when it comes to indoor life. Some thrive; others sulk. You want winners. Here’s a shortlist of the best culinary herbs for indoor growing — the ones that practically beg to be harvested.
Top 5 Herbs for Beginners
- Basil — Loves warmth and light. Pinch the tops to keep it bushy. Perfect for pesto, Caprese, and pasta.
- Mint — Nearly impossible to kill. Grows like a weed (in a good way). Great for teas, mojitos, and lamb.
- Chives — Thin, grass-like leaves with a mild onion flavor. Snip them straight into salads or soups.
- Parsley — A workhorse. Flat-leaf (Italian) is more flavorful. Adds freshness to almost anything.
- Thyme — Tiny leaves, huge flavor. Loves drier soil. Perfect for roasted chicken and vegetables.
Honorable mentions: rosemary (needs a bit more patience), oregano (spreads fast), and cilantro (short-lived but worth it).
Setting Up Your Indoor Herb Garden: The Essentials
Okay, so you’ve picked your herbs. Now what? You don’t need a greenhouse or fancy gear. But a few basics make all the difference. Let’s break it down.
Light: The Non-Negotiable
Herbs are sun-worshippers. Most need at least 6 hours of bright, indirect light per day. A south-facing window is gold. East or west? They’ll do, but you might need a grow light to supplement — especially in winter. And trust me, a cheap LED grow light (full spectrum) can turn a dim corner into a mini herb farm. I use one that clips onto my shelf. Works like a charm.
Containers and Drainage
Drainage holes are non-negotiable. Herbs hate soggy roots. Terracotta pots are classic — they breathe. Plastic works too if you’re careful with watering. Size matters: a 4- to 6-inch pot is fine for most herbs. Group them together for humidity (and a prettier display).
Soil and Watering
Use a well-draining potting mix — not garden soil. Add a bit of perlite or sand for drainage. Water when the top inch of soil feels dry. Stick your finger in. If it’s damp, wait. Overwatering is the #1 killer of indoor herbs. Seriously. I’ve drowned more basil than I care to admit.
Here’s a quick reference table for watering and light needs:
| Herb | Light Needs | Watering Frequency |
|---|---|---|
| Basil | 6-8 hours bright | Every 2-3 days |
| Mint | 4-6 hours bright | Every 2-3 days |
| Chives | 6 hours bright | Every 3-4 days |
| Parsley | 6 hours bright | Every 2-3 days |
| Thyme | 4-5 hours bright | Every 4-5 days |
Adjust based on your home’s humidity and temperature. Dry winter air? Water a bit more often. But always check the soil first.
Planting Methods: Seeds vs. Transplants
Here’s where you have a choice. Starting from seed is cheaper and deeply satisfying — watching a tiny sprout unfurl is pure joy. But it takes patience. Transplants (small starter plants from a nursery) give you a head start. For indoor herb gardening for culinary use, I recommend transplants for basil and mint (they’re fast growers), and seeds for chives and parsley (they’re easy).
Pro tip: If you go with seeds, soak them overnight before planting. It speeds up germination. And use a heat mat if you have one — basil loves warmth.
Harvesting: The Art of the Snip
This is the fun part. But there’s a right way and a wrong way. Never pull leaves off — snip them with clean scissors or shears. Always cut above a leaf node (where leaves meet the stem). That encourages bushier growth. For basil, pinch off the top two sets of leaves regularly. For mint, cut whole stems just above a node.
A good rule: never harvest more than one-third of the plant at a time. You want it to recover and keep producing. And harvest in the morning — that’s when oils are most concentrated. The flavor is literally at its peak.
Common Problems (and How to Fix Them)
Even the best indoor herb gardens hit snags. Here’s what to watch for:
- Leggy, pale plants — Not enough light. Move closer to window or add a grow light.
- Yellow leaves — Usually overwatering. Let soil dry out more between waterings.
- Drooping leaves — Could be underwatering or root rot. Check soil moisture.
- Pests (aphids, spider mites) — Wipe leaves with mild soapy water. Neem oil works too.
- Mold on soil — Improve air circulation. Water less frequently.
Honestly, most problems come down to light or water. Get those two right, and your herbs will forgive almost everything else.
Using Your Herbs in the Kitchen: Beyond Garnish
Fresh herbs aren’t just for decoration. They’re the backbone of so many dishes. Think beyond the obvious. Toss thyme leaves into roasted potatoes. Stir chopped chives into scrambled eggs. Make a quick chimichurri with parsley, garlic, olive oil, and vinegar. Or muddle mint into lemonade.
One of my favorite tricks? Freeze herbs in olive oil inside ice cube trays. Pop a cube into soups or stews for instant flavor. Or make herb butter — mix chopped herbs with softened butter, roll it in parchment, and slice as needed. It’s restaurant-level stuff, but you made it.
Seasonal Adjustments: Keeping Your Garden Alive Year-Round
Indoor herb gardening for culinary use isn’t a one-season wonder. But winter does throw curveballs — shorter days, drier air. Rotate your pots weekly so all sides get light. Mist leaves occasionally to boost humidity. And consider a small fan on low setting — it strengthens stems and prevents mold.
In summer, watch for overheating near windows. Herbs can scorch. Move them back an inch or two. And if you have a balcony, give them a few hours outdoors — they’ll love the breeze.
The Real Payoff
Here’s the thing nobody tells you: indoor herb gardening changes how you cook. You start reaching for herbs instinctively. A pinch of thyme here, a handful of basil there. Meals get brighter. You waste less. And there’s a quiet pride in saying, “Oh, that? I grew it.”
It’s not about perfection. Some plants will die. You’ll forget to water. You’ll buy a replacement. That’s fine. The point is the process — the small, daily ritual of tending something alive. And then eating it. That’s a kind of magic.
So grab a pot, some soil, and a few seeds. Your kitchen — and your taste buds — will thank you.